Welcome to your go-to guide on concrete for pavers in NZ. Whether you’re planning a new driveway, patio, or garden path, choosing the right concrete is key to getting a solid, long-lasting finish. In this post, you’ll learn what types of concrete work best for different outdoor spaces, how to prepare the base properly, and what to expect in terms of cost, durability, and maintenance. We’ll also cover common mistakes to avoid, tips for DIYers, and the latest trends in paving across New Zealand. If you’re aiming for results that last through every season, this guide is for you.
The best concrete for pavers in NZ is a high-strength mix, typically 20MPa to 25MPa, designed to handle outdoor weather and foot or vehicle traffic. Precast concrete pavers are popular for patios and paths, while poured concrete suits driveways and larger areas. A solid base and proper drainage are also essential for long-lasting results.
Table of Contents
Why Use Concrete For Pavers?
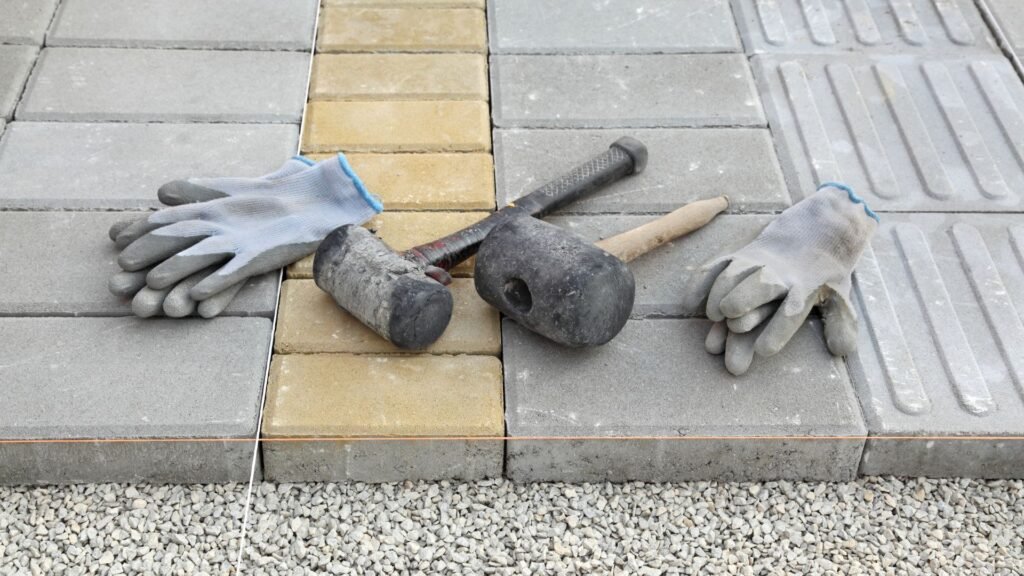
When it comes to choosing the right material for outdoor spaces in New Zealand, concrete stands out as one of the most practical and reliable options. Whether you’re building a patio, driveway, walkway, or pool area, concrete pavers offer a mix of strength, cost-effectiveness, and visual appeal. Let’s explore why more Kiwis are choosing concrete paving for their homes and properties.
Durable In NZ’s Climate
New Zealand weather can be tough on outdoor surfaces, especially with regular rainfall, strong UV exposure, and seasonal temperature changes. Concrete pavers NZ homeowners trust are made to withstand these elements without cracking, shifting, or fading easily. When installed correctly, they last for decades with minimal maintenance. This durability makes them a smart long-term investment for any outdoor project.
Affordable Compared To Other Materials
Concrete is one of the most cost-effective materials for paving. Compared to natural stone, brick, or timber, it offers excellent value for money. You get the durability and performance of higher-end materials at a much lower price. Whether you’re hiring a professional or doing it yourself, concrete paving helps keep your total project cost under control without sacrificing quality.
Design Flexibility With Textures, Shapes, And Colours
Concrete pavers come in a wide range of designs. You can choose from smooth or textured finishes, square or irregular shapes, and colours that complement any exterior. Want a sleek, modern look? Go with grey or charcoal pavers. Prefer a rustic feel? Earth tones or exposed aggregate work well. This flexibility lets you customise your space to match your taste and the style of your home.
Common Outdoor Uses In New Zealand Homes
Concrete paving is used across many parts of the home. For driveways, it’s strong enough to support vehicles without cracking. For walkways and patios, it offers a safe, slip-resistant surface that looks great year-round. Around pools, specially sealed concrete pavers resist water and heat, helping prevent slips and damage. Many NZ homeowners also use them for garden paths and entertainment areas.
Why It’s A Smart Choice For Kiwi Homeowners
When considering concrete pavers NZ residents often weigh durability, price, and appearance. Concrete consistently ranks high in all three areas. It’s a reliable material that handles the local climate, suits a wide range of home styles, and stays within most renovation budgets. Whether you’re updating a small section or redesigning your entire yard, concrete paving gives you a solid base that looks good and lasts.
By choosing concrete, you’re not only improving your home’s function and curb appeal, you’re also making a low-maintenance, high-value choice that’s built for NZ conditions.
Types Of Concrete Used For Pavers
When planning a paving project in New Zealand, one of the first choices you’ll face is the type of concrete to use. The right option depends on your design, budget, and how the area will be used. Below is a clear breakdown of the most common types of concrete used for pavers, along with tips on when and where to use each one.
Precast Concrete Vs Poured Concrete
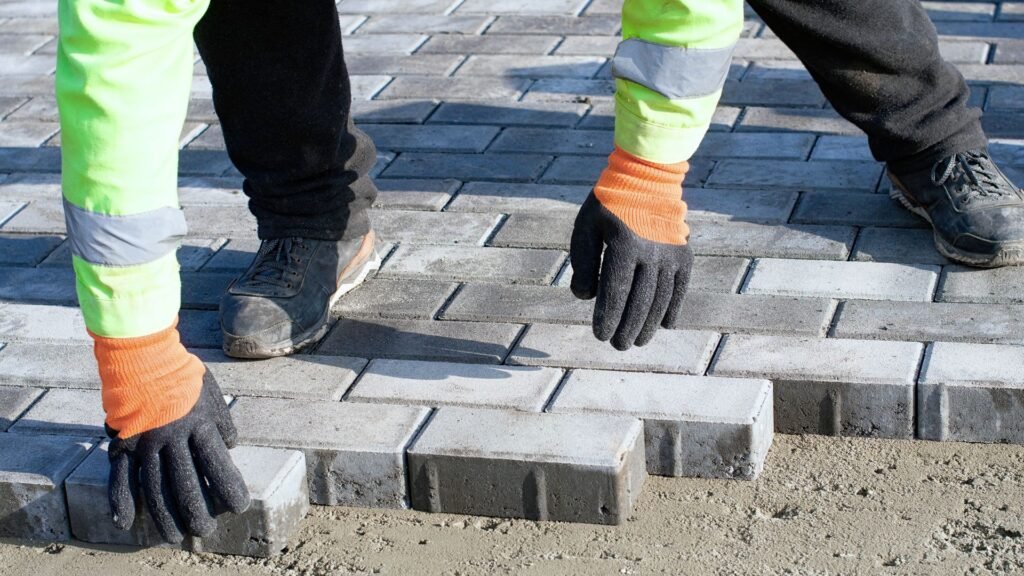
- Precast concrete pavers are made in a factory, then delivered to the site ready to install. They come in standard shapes, sizes, and textures. This makes them a popular choice for patios, walkways, and garden paths. They’re also easier to replace if one cracks or gets damaged.
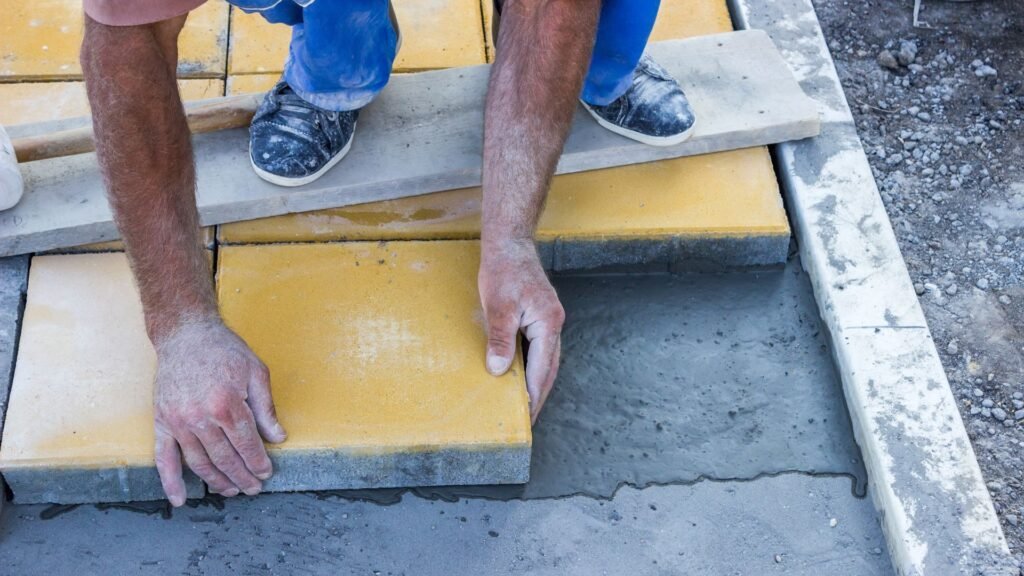
- Poured concrete, on the other hand, is mixed and poured directly into the site. This method works best for driveways, large outdoor areas, or projects with custom shapes. It allows more design freedom but requires more labour and curing time.
- When to use each:
Use precast concrete if you want faster installation and uniform style. Choose poured concrete if you need a custom layout or are paving a large surface with curves or slopes. - Durability in wet regions:
Both types can last well in New Zealand’s wet climate if installed correctly. But precast pavers generally perform better in areas with frequent rain since they offer better drainage between joints and are less prone to cracking from water expansion.
Plain Vs Decorative Concrete
- Plain concrete is simple, grey, and functional. It’s budget-friendly and commonly used for foundations, utility spaces, or areas where looks aren’t a top priority.
- Decorative concrete is enhanced with colours, stamps, or finishes that mimic stone, brick, or tile. It’s often used in front yards, outdoor entertainment spaces, or any area where appearance matters.
- When to use each:
Plain concrete is ideal for hidden or practical surfaces. Decorative concrete is better suited for visible areas where you want to improve street appeal or match landscape themes. - Durability in wet regions:
Both types hold up well in moisture if sealed properly. However, decorative concrete needs more frequent maintenance to keep its look sharp over time, especially in regions with high rainfall or moss growth.
Textured Vs Smooth Finishes
- Textured concrete includes finishes like broomed, exposed aggregate, or stamped surfaces. These are slip-resistant and help with traction, making them great for driveways, pool areas, and sloped paths.
- Smooth concrete has a polished or trowelled finish, giving it a clean, modern look. While sleek, it can become slippery when wet, especially outdoors.
- When to use each:
Go with textured concrete for safety and grip, especially around wet zones. Use smooth finishes for indoor areas, covered patios, or decorative use in dry, flat spaces. - Durability in wet regions:
Textured concrete is the safer and longer-lasting choice in New Zealand’s wet regions. It reduces slip hazards and handles water runoff better. Smooth concrete may look clean, but it can lead to issues with algae buildup and slip risk outdoors.
Each concrete type has strengths depending on where and how you plan to use it. By understanding your options and the conditions specific to your area, especially New Zealand’s often damp climate, you can choose a solution that’s both long-lasting and easy to maintain.
How To Choose The Right Concrete Mix
Choosing the right concrete mix is one of the most important steps when installing pavers. Whether you’re laying a patio, pathway, or driveway, the quality and type of concrete you use will affect the durability, appearance, and long-term performance of the surface. In New Zealand, the weather, soil type, and traffic load all play a role in deciding what concrete mix works best for your project.
Importance Of Strength (e.g., 20MPa, 25MPa)
When it comes to strength, most homeowners and contractors in NZ choose between 20MPa and 25MPa concrete mixes. MPa stands for megapascal and measures the compressive strength of the concrete. A 20MPa mix is suitable for light-use areas like patios or footpaths. It’s strong enough to handle everyday use without cracking or wearing out quickly. For areas that carry heavier loads, such as driveways or entranceways, a 25MPa mix is the safer choice. It provides more resistance to pressure and lasts longer under vehicle traffic or heavy outdoor furniture. Going below 20MPa might save money short term, but it often leads to early repairs or replacements, especially in New Zealand’s climate, where rainfall and temperature changes can affect concrete over time.
Additives For Extra Durability Or Quick Setting
Additives can make a big difference in how your concrete performs. For example, using plasticisers helps improve workability without adding more water. This keeps the mix strong while making it easier to pour and shape. Accelerators are useful when you want faster setting times, great for colder months or when you’re on a tight timeline. On the other hand, retarders slow down the setting time, giving you more flexibility in warm conditions. For moisture resistance, adding waterproofing agents can reduce the chance of water absorption, which is especially helpful in areas with high rainfall. If you’re aiming for the best concrete mix for pavers NZ homeowners rely on, choosing a mix with the right additives ensures better long-term performance and reduces maintenance needs.
Best Mixes For High-Traffic Areas Vs Garden Paths
Not all outdoor spaces need the same concrete mix. High-traffic areas like driveways or main walkways need a stronger, more durable mix, typically 25MPa with added reinforcement like mesh or fibers. These mixes stand up to weight, weather, and wear and tear. In contrast, garden paths or decorative spaces don’t require the same strength. A 20MPa mix works well here and allows for more flexibility in design, including coloured or textured finishes. It’s also easier to handle for DIY projects and still delivers solid performance for light foot traffic. Matching the mix to the job means you’re not overpaying for unnecessary strength or underbuilding something that won’t last.
When selecting the best concrete mix for pavers NZ-wide, always consider where it will be used, what kind of load it will bear, and what kind of finish you want. Talk to your supplier or contractor if unsure, they can help you choose the right mix for your specific conditions. Getting this right from the start can save you time, money, and frustration down the line.
Preparing The Base: What You Need To Know
A strong, stable base is the foundation of every successful paving project. Whether you’re installing a garden path, driveway, or patio, skipping this step can lead to shifting pavers, pooling water, and a finish that doesn’t last. In New Zealand, where weather and soil conditions vary by region, it’s even more important to prepare the base correctly. Here’s what you need to know about building a solid concrete paving base NZ homeowners can trust.
The most commonly used base materials are AP20 gravel and washed sand. AP20 is a crushed aggregate that compacts well, providing the structure your pavers need to stay in place. It typically contains a mix of gravel and fine particles, which help lock everything together. Spread it in layers and compact thoroughly with a plate compactor after each layer. Aim for a depth of at least 100mm for foot traffic and up to 150mm for driveways.
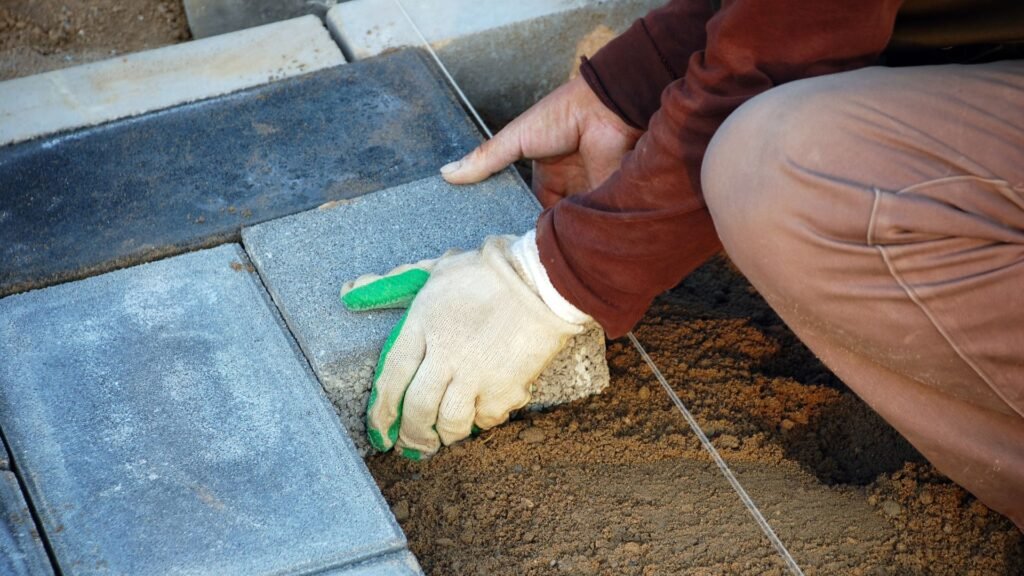
Once your gravel base is level and compact, a thin layer of bedding sand is added on top. This layer helps with final levelling and gives the pavers a cushion to sit on. Use sharp or washed sand, not beach sand, as it binds better and drains faster. The sand layer should be around 20–30mm thick, spread evenly, and screeded to a smooth finish before placing your pavers.
Drainage is another critical part of base preparation. Without it, water can collect under your pavers, weakening the base and leading to sinking or cracking. Make sure the paved area has a gentle slope, around 2%, to guide water away. If you’re paving near a house or structure, slope the surface away from it to prevent moisture issues. In wetter parts of NZ, adding a drainage layer or using free-draining base materials is a smart move.
Soil type also plays a big role in base stability. Many areas in New Zealand have clay-heavy soils that retain moisture and shift easily. If you’re working on clay, you may need to dig deeper and use geotextile fabric under the gravel to stop it from mixing with the soil below. This keeps the base firm and reduces the risk of pavers moving over time.
Taking the time to build a proper concrete paving base NZ-style sets the foundation for a professional result. It supports the pavers, improves drainage, and helps them stay level and strong for years to come. Whether you’re doing it yourself or hiring a contractor, don’t overlook this essential step. Your entire project depends on it.
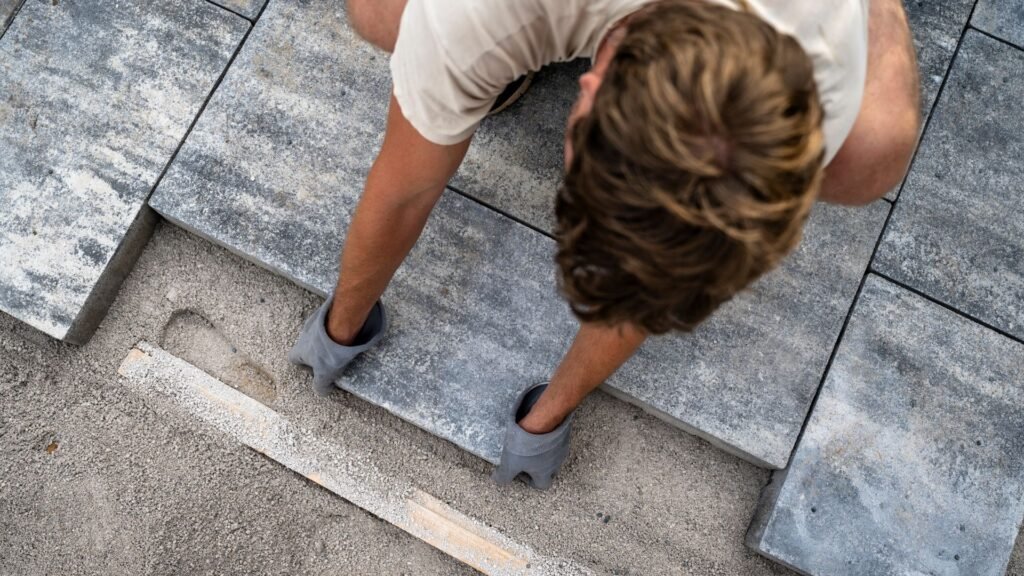
Concrete Paver Installation: Step-By-Step Overview
Installing concrete pavers may look simple, but getting it right takes planning, attention to detail, and patience. Whether you’re building a patio, pathway, or driveway, following a step-by-step process helps avoid costly mistakes. Here’s how to install concrete pavers properly from start to finish.
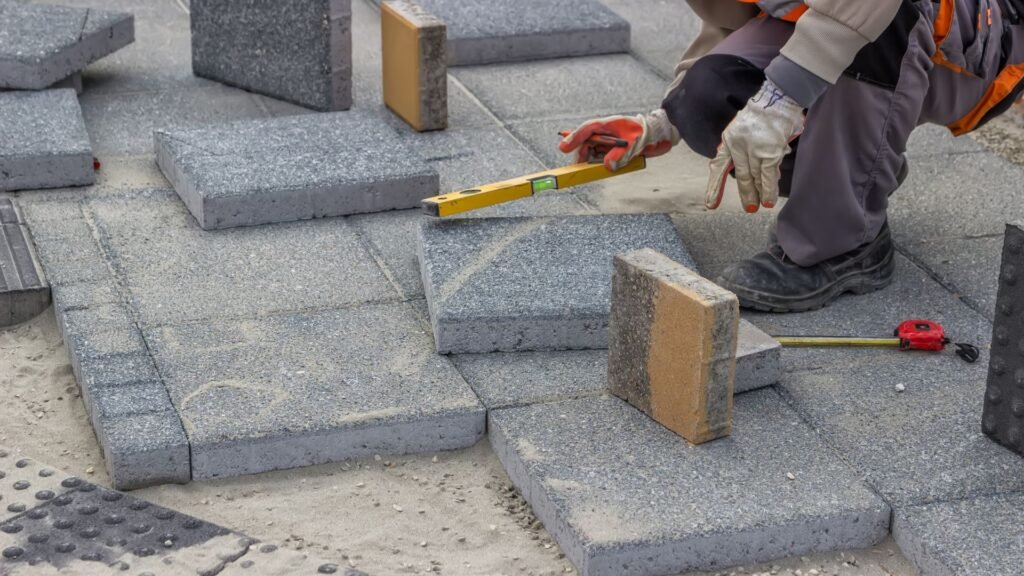
Planning And Layout
Start by deciding where you want your pavers and what shape or design you want to achieve. Use a measuring tape to mark out the area and outline it with stakes and string lines. This keeps everything square and makes sure you’re working within the right dimensions. Think about how water will flow across the area and where the runoff might go. Planning proper drainage now prevents future problems.
Tip: Use spray paint or chalk to mark curves or unique shapes on the ground before digging.
Excavation And Base Preparation
Dig down to the right depth, usually about 150mm to 200mm, depending on the type of paver and expected load. Remove all grass, roots, and debris. Once excavated, lay a sub-base using compacted gravel such as AP20. This provides a solid foundation that supports the weight of the pavers and prevents movement over time. After compacting the gravel, spread a thin bedding layer of washed sand (around 20–30mm thick) on top.
Tip: Compact each layer thoroughly using a plate compactor to prevent sinking or uneven pavers later.
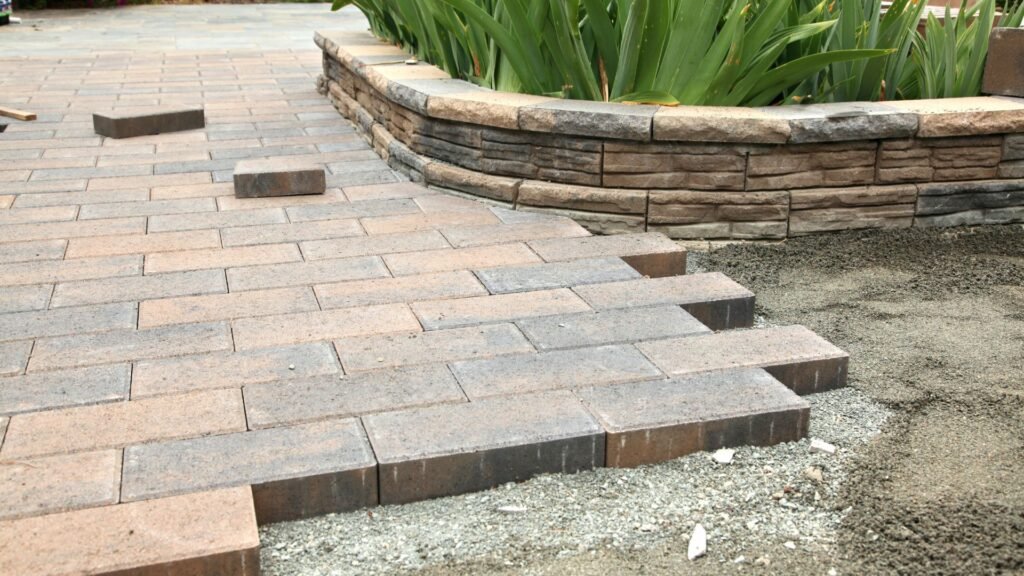
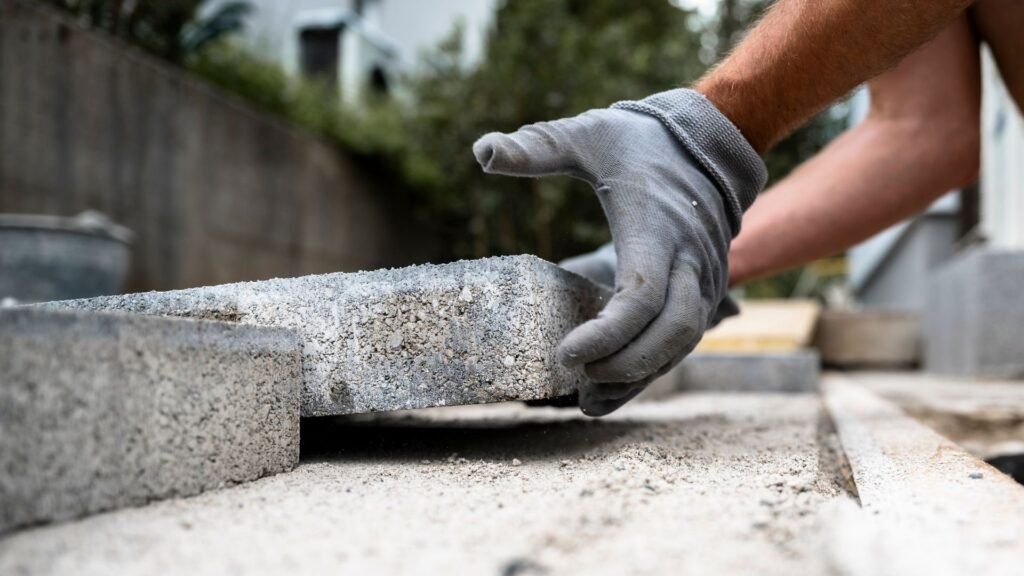
Pouring Or Placing Pavers
If you’re using poured concrete, build your formwork using timber to frame the area and hold the shape. Mix and pour the concrete evenly, then level it with a screed board. Smooth the surface with a trowel if needed. For precast pavers, start laying them from a straight edge, such as a wall or string line, and place them gently on the sand base. Leave even gaps (typically 2–5mm) between each unit for jointing.
Tip: Use spacers and string lines to keep your pattern aligned and consistent.
Curing And Finishing
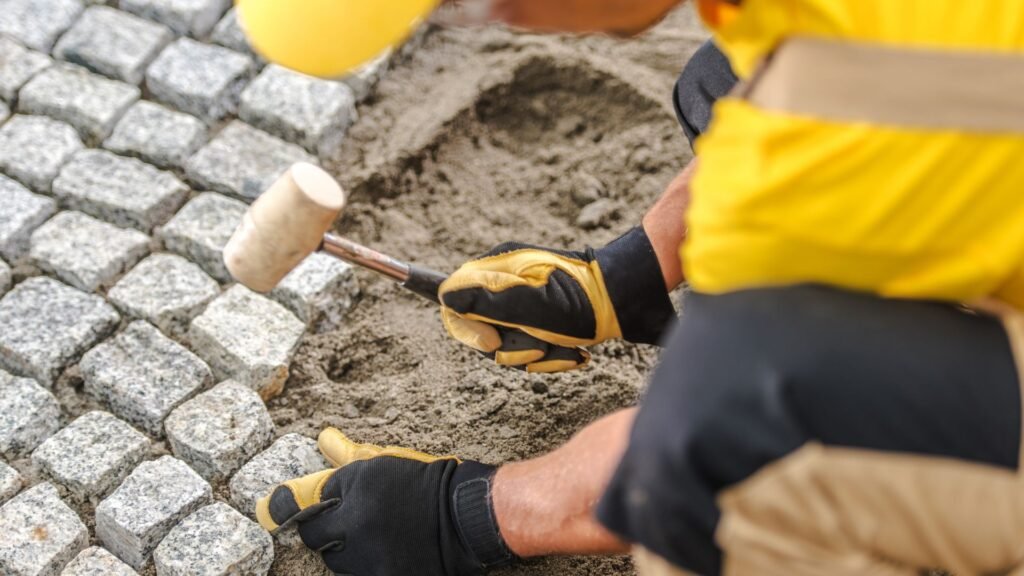
Poured concrete needs time to cure properly. Cover the surface with plastic sheeting or a curing compound to keep it moist for at least 7 days. This prevents cracking and ensures maximum strength. If you’re using pavers, sweep fine sand into the joints to lock them in place. Then compact the surface again to settle the pavers firmly into the base. Finish by sealing the area if desired, this protects against weather and wear.
Tip: Avoid heavy foot traffic or vehicles until the surface is fully cured and stable.
This step-by-step process ensures your concrete pavers stay level, durable, and attractive for years. Whether you’re going DIY or hiring a pro, these steps apply to almost any outdoor paving project in New Zealand.
Cost Of Concrete For Pavers In NZ
When planning an outdoor project, one of the first things that comes to mind is the budget. Understanding the concrete pavers cost in NZ can help you avoid unexpected expenses and make informed choices. Whether you’re laying a small garden path or a full driveway, several factors affect the final cost. These include materials, labour, location, and whether you choose to DIY or hire a contractor.
Material Cost Breakdown (Concrete, Sand, Labour)
The core materials you’ll need are concrete, sand, and a compacted base layer like crushed gravel. On average, expect to pay between $40 to $80 per square metre for concrete pavers in New Zealand. This includes the cost of standard concrete mixes suitable for outdoor paving, which are typically 20MPa to 25MPa in strength.
Sand and gravel for the base layer can add another $10 to $20 per square metre, depending on the quality and volume required. Labour costs vary widely based on the job size and complexity. If you hire a contractor, installation can cost an additional $50 to $100 per square metre, covering site prep, base compaction, paver laying, and finishing.
DIY Vs Hiring A Contractor
Going the DIY route can save a lot on labour, especially for smaller areas like garden paths or patios. You’ll still need to budget for tool hire, materials, and possibly a delivery fee. DIY paving projects often range from $50 to $90 per square metre in total, depending on your level of experience and access to tools.
Hiring a professional ensures proper drainage, alignment, and durability. While the initial cost is higher, a skilled installer can prevent long-term issues like shifting, cracking, or poor water flow. For larger or high-traffic areas like driveways, working with a contractor is usually the safer choice.
Regional Price Differences (Auckland Vs Christchurch)
Where you live in New Zealand also plays a big role in the concrete pavers cost NZ. Prices in Auckland tend to be higher due to increased demand, material transport fees, and labour rates. In Auckland, fully installed concrete paving can range from $120 to $160 per square metre.
In contrast, Christchurch generally offers more affordable rates. A similar job may cost $90 to $130 per square metre, depending on availability of materials and competition among contractors.
Regional differences also apply to DIY projects. Material delivery fees, supplier availability, and even rental costs for equipment like compactors or mixers can vary.
Understanding the cost breakdown helps you plan your project with fewer surprises. Whether you choose a DIY approach or go with a contractor, knowing the average concrete pavers cost in NZ lets you budget more effectively and get the best results for your property.
Common Mistakes To Avoid When Using Concrete For Pavers In NZ
Even the best concrete mix won’t give you a stable, long-lasting result if you make basic mistakes during installation. Many homeowners and DIYers run into issues that could have been avoided with a bit of planning. Here are the three most common mistakes people make when laying concrete pavers in New Zealand, and how you can avoid them.
Skipping Base Compaction
This is the most common and damaging mistake. If you don’t properly compact the base material before laying your concrete or pavers, the ground will shift over time. That leads to uneven surfaces, sinking, and cracks. You may not notice it immediately, but give it a couple of weeks, then the wobble starts. If your pavers move or rock when stepped on, the base probably wasn’t compacted properly. Use a plate compactor on every layer, from the subsoil to the final bedding sand, to make sure the base is firm and level. Don’t just eyeball it, check with a level and compact in small sections.
Using The Wrong Concrete Mix
Not all concrete is created equal. Using a weak or incorrect mix can lead to surface cracks, poor durability, or pavers that don’t hold up in changing weather. For most residential outdoor spaces in NZ, a 20MPa to 25MPa mix is recommended. That gives you the right balance of strength and flexibility for driveways, patios, or garden paths. Avoid overly fast-setting mixes unless you know how to work quickly and confidently. For colder or wetter regions, consider mixes with additives that improve water resistance and curing performance.
Poor Drainage Planning
Water is the enemy of concrete longevity. If your paving site doesn’t have proper drainage, water will pool under or around your pavers. Over time, this softens the base, encourages weed growth, and leads to shifting or cracking. Always grade the area so water flows away from structures. Include drainage channels or soak pits if needed, especially in flat or clay-heavy areas common across parts of NZ. A slight slope of 1–2% is usually enough to keep water moving. Don’t overlook this, it’s easier to add drainage now than fix sinking pavers later.
Installing concrete pavers isn’t just about choosing the right material, it’s about getting the groundwork right. If your pavers wobble after 2 weeks, you probably skipped one of these key steps. Plan carefully, work slowly, and take the time to get each layer right before moving on. That’s how you get results that last.
How To Maintain Concrete Pavers
Proper maintenance helps your concrete pavers last longer, stay clean, and look great year-round. In New Zealand, where moisture and seasonal changes are common, taking care of your pavers is especially important. Whether you’ve just installed a new patio or you’re looking to refresh an older surface, here’s how to maintain concrete paving NZ homeowners can count on.
Sealing Concrete
Sealing your concrete pavers is one of the best ways to protect them from the elements. A high-quality sealer creates a barrier against water, oil stains, and UV damage. For areas with a lot of rain or exposure to direct sunlight, sealing prevents fading, cracking, and moss buildup.
Choose a penetrating or film-forming sealer based on your preference for a matte or glossy finish. Always apply sealer when the surface is clean and dry. A roller or sprayer works best for even coverage. Most experts recommend resealing every 2 to 3 years, depending on foot traffic and exposure.
Removing Moss Or Stains
In New Zealand’s damp climate, moss and algae often grow between or on top of pavers. If left unchecked, these can make the surface slippery and unsightly. To clean it:
- Use a stiff brush and warm water with a mild detergent for light moss or dirt.
- For heavy buildup, a pressure washer can be effective, just avoid holding it too close to avoid surface damage.
- Avoid bleach unless heavily diluted, as it can harm plants or nearby grass.
For oil or rust stains, use a cleaner specifically designed for concrete. Always test in a small area first before applying it widely.
Handling Cracks Or Chips
Over time, concrete pavers may develop minor cracks or chips, especially in high-traffic or freeze-thaw areas. While these issues are mostly cosmetic at first, they can worsen if ignored.
Start by identifying the cause, poor drainage, shifting soil, or freeze cycles. You can patch small cracks using a concrete filler or repair compound available at most hardware stores. If a paver is too damaged, replacing a single unit is often better than patching.
When replacing, be sure to match the color and size. Keep a few extra pavers from the original batch during installation for future repairs.
Maintaining concrete paving NZ-wide isn’t just about keeping it clean, it’s about protecting your investment. Regular care means fewer repairs, better curb appeal, and longer life for your outdoor surfaces. Make it a part of your seasonal home maintenance routine, especially before winter and after heavy rain.
Eco-Friendly Alternatives And Trends
Concrete paving has come a long way in New Zealand, not just in terms of durability and design but also in sustainability. More homeowners and landscapers are now exploring eco-friendly alternatives to traditional paving. These options not only reduce environmental impact but also add value and appeal to outdoor spaces. If you’re planning a paving project in NZ and want a greener approach, here’s what you need to know about permeable concrete pavers, recycled materials, and current landscaping trends.
Permeable Concrete Pavers
Permeable concrete pavers are designed to let water pass through the surface and soak into the ground beneath. This helps reduce surface runoff, prevent puddles, and recharge groundwater levels. In areas with frequent rain like Auckland or Wellington, they can prevent water pooling around homes and gardens.
Unlike traditional solid concrete, these pavers are made with wider joints and specific aggregate mixes that support drainage. They work best in driveways, patios, and garden paths where managing water is important. Permeable pavers also reduce pressure on stormwater systems, which is a growing concern in many NZ cities. If you’re environmentally conscious, this is a practical step toward sustainable paving without sacrificing appearance or function.
Recycled Concrete Use
Recycled concrete is another eco-conscious option gaining popularity across New Zealand. This involves crushing and reusing concrete from old structures, driveways, or construction sites to make new pavers or base layers. Using recycled materials reduces waste in landfills and cuts down on the carbon footprint from producing new concrete.
Many suppliers in NZ now offer pavers made with recycled content. These options look just as good as standard pavers and meet the same strength requirements for residential use. For larger projects or public spaces, combining recycled concrete with permeable features can double the environmental benefit.
Trends In NZ Landscaping
Modern landscaping in New Zealand is leaning toward low-maintenance, eco-friendly solutions. Homeowners want stylish outdoor spaces that are functional and sustainable. This has led to increased use of native plants, natural materials, and water-saving features alongside concrete pavers.
Some of the latest trends include mixing concrete pavers with gravel paths, using grass-filled grid pavers, or blending pavers with timber decking. Another rising trend is modular paving systems that can be lifted and reused, ideal for those who want flexibility in their outdoor layout. These trends reflect a broader shift toward sustainability, especially in urban and coastal regions where environmental impact matters most.
Whether you’re upgrading a patio or planning a new build, choosing eco-friendly concrete options helps you create a long-lasting outdoor space while keeping New Zealand greener for future generations.
Ready to start your paving project? Visit us to explore concrete options, get expert advice, and find everything you need for durable, great-looking pavers in NZ.
FAQs: About Concrete For Pavers In NZ
What type of concrete is best for pavers in NZ?
A mix with a strength of 20MPa to 25MPa is ideal for most outdoor paver projects in NZ. It balances durability and cost, handling foot traffic and moderate vehicle loads.
Are precast concrete pavers better than poured concrete?
Precast pavers are easier to install, come in uniform shapes, and offer more design options. Poured concrete suits larger areas but requires more prep and finishing.
How thick should concrete pavers be for driveways?
For driveways, concrete pavers should be at least 60mm thick. This ensures they can handle the weight of vehicles without cracking or shifting.
Do I need a concrete base under my pavers?
Not always. Most paver installations use a compacted gravel base with sand. But for high-traffic areas, a concrete base adds extra stability.
What’s the cost of concrete for pavers in NZ?
The cost varies by region, but expect to pay between $40–$80 per square metre for materials. Labour, design, and prep may add to the total.
Can I install concrete pavers myself?
Yes, DIY installation is possible with proper planning and tools. You’ll need to prepare the base, level the surface, and use string lines or spacers.
How long does it take for concrete pavers to cure?
Precast pavers are ready to use immediately. For poured concrete, allow at least 7 days to cure for foot traffic, and 28 days for full strength.
Do concrete pavers need sealing in NZ?
Sealing is recommended to protect against moss, stains, and moisture damage—especially in wet regions. Reapply every 2–3 years.
How do I maintain concrete pavers?
Sweep regularly, wash with mild detergent, and treat stains quickly. Reseal as needed and fix uneven areas before they worsen.
Are concrete pavers eco-friendly?
Yes, especially if you use permeable or recycled concrete pavers. These options allow water drainage and reduce environmental impact.
Conclusion
Choosing the right concrete for pavers in NZ can make all the difference in the durability, appearance, and long-term performance of your outdoor space. From understanding the best concrete mix and base preparation to knowing how much it costs and what mistakes to avoid, this guide covers everything you need to plan your paving project with confidence. Whether you’re tackling a small garden path or a full driveway, using the correct materials and following proper steps will save you time, money, and stress in the long run. We encourage you to take what you’ve learned here and apply it wisely. Start by evaluating your space, setting a realistic budget, and selecting the concrete option that suits your needs. If you have any questions about paver choices, installation tips, or local material options in New Zealand, feel free to leave a comment or reach out. We’re here to help you get it right the first time.